Unofficial history of the Australian & New Zealand Armed Services 

 Search  &  Help Recruits Military History Hall of Heroes Indigenous Slouch hat + ARMY Today Uniforms Badges

 Colours & Flags Weapons Food Equipment Assorted Medals Armour Navy Air Power 

Nurses - Medical Tributes Poetry - Music Posters & Signs Leaders The Enemy Humour Links Killing Anzac

Click to escape. Subject to Crown copyright.
Category:1st AIF

Click to go up one level


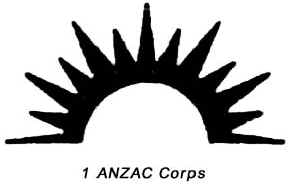
  • In February 1916 when I Anzac Corps moved from Egypt to France it consisted of 
    • 1st Australian Division
    • 2nd Australian Division
    • The New Zealand Division
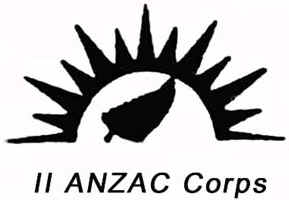
  • In May 1916 when II Anzac Corps moved from Egypt to France it consisted of 
    • 4th Australian Division
    • 5th Australian Division
  •  At Messines in 1917 II Anzac Corps was made up of
    • a British Division
    • the New Zealand Division
    • 3rd Australian Division
    • 4th Australian Division 
  • Later  1 Anzac and 2 Anzac were combined, without the New Zealanders, and became the Australian Corps. With the addition of some Americans it became the largest Corps in the British Army with some 200,000 men under arms. Monash used it to smash the Hindenburg Line and bring the war to a conclusion.

Notes. In 1916 The British Expeditionary Force consisted of 49 Divisions (including the 5 Aussie Divisions) and the French had 111 Divisions (some as low quality reserves). The British Empire had 1,263,000 men in France including 90,000 Australians.
What is a Corps? The main role of a Lieutenant General was command of a Corps. This was a huge formation; the Australian Corps in France was normally fielding around 200,000 men in 1918. Corps became more important as the war went on. In 1914, Corps were just a grouping of divisions, and their only permanent units were a Headquarters and a Signal company. 

By 1918, so-called corps troops (those troops allocated to the Corps but not one of its divisions) numbered over 50,000. Corps was the the major tactical and operational formation, but had no input into strategic matters. Under British doctrine, Corps was responsible for the administration of the area in which it operated, but its logistical "tail" remained smaller than its fighting "teeth" -- something by no means true of Army, the next formation up. 

In addition to the commander, the Corps Headquarters also had posts for five Brigadier Generals, for a chief of staff (BGGS), engineers, administration, artillery (GOCRA) and heavy artillery (BGHA).

The Australian Corps, 1918

  • The Australian Corps was the largest and most powerful military force in this nation's history. It consisted of 4 Australian Divisions and support troops. (Approx 170,000 men)

  • It was a combination of 1 Anzac Corps & II Anzac Corps minus the New Zealanders

When you consider the AIF you must remember that it was never designed to be, and never became, a completely self sufficient Army. From the word "Go" it was designed to provide combat troops and some limited support for them but that it would become part of a larger (British) army that would provide the essential support services.

  • Webmaster's note. It will be clearly seen that the British Units, shown below in black italic still made up a large section of the "non-front line" troops

  • Note also the US troops in the Corps.

 Australian Corps (France, 6 July 1918)

  • Australian Corps Artillery

    • 3rd (Army) Field Artillery Brigade [18 x 18 pounders, 6 x 4.5 inch howitzers]

      • 7th,8th,9th Field Artillery Batteries

      • 103rd Field Artillery (Howitzer) Battery

      • 3rd (Army) Field Artillery Brigade Ammunition Column

    • 6th (Army) Field Artillery Brigade [18 x 18 pounders, 6 x 4.5 inch howitzers]

      • 16th,17th,18th Field Artillery Batteries

      • 106th Field Artillery (Howitzer) Battery

      • 6th (Army) Field Artillery Brigade Ammunition Column

    • 12th (Army) Field Artillery Brigade [18 x 18 pounders, 6 x 4.5 inch howitzers]

      • 45th,46th,47th Field Artillery Batteries

      • 112th Field Artillery (Howitzer) Battery

      • 12th Field Artillery (Army) Brigade Ammunition Column

    • British 5th (Army) Horse Artillery Brigade [24 x 13 pounders]

      • British G, N, Z, O Horse Artillery Batteries

      • British 5th (Army) Horse Artillery Brigade Ammunition Column

    • British 16th (Army) Horse Artillery Brigade [18 x 13 pounders]

      • British A, Q, U Horse Artillery Batteries

      • British 16th (Army) Horse Artillery Brigade Ammunition Column

    • British 14th (Army) Field Artillery Brigade [18 x 18 pounders, 4 x 4.5 inch howitzers]

      • British A/14th,68th,88th Field Artillery Batteries

      • British 402nd Field Artillery (Howitzer) Battery

      • British 14th (Army) Field Artillery Brigade Ammunition Column

    • British 77th (Army) Field Artillery Brigade [18 x 18 pounders, 4 x 4.5 inch howitzers]

      • British A/77th,B/77th,C/77th Field Artillery Batteries

      • British D/77th Field Artillery (Howitzer) Battery

      • British 77th (Army) Field Artillery Brigade Ammunition Column

    • British 86th (Army) Field Artillery Brigade [18 x 18 pounders, 4 x 4.5 inch howitzers]

      • British A/86th,B/86th,C/86th Field Artillery Batteries

      • British D/86th Field Artillery (Howitzer) Battery

      • British 86th (Army) Field Artillery Brigade Ammunition Column

    • British 96th (Army) Field Artillery Brigade [18 x 18 pounders, 4 x 4.5 inch howitzers]

      • British 407th,408th,409th Field Artillery Batteries

      • British 410th Field Artillery (Howitzer) Battery

      • British 96th (Army) Field Artillery Brigade Ammunition Column

    • British 150th (Army) Field Artillery Brigade [18 x 18 pounders, 4 x 4.5 inch howitzers]

      • British A/150th,B/150th,C/150th Field Artillery Batteries

      • British D/150th Field Artillery (Howitzer) Battery

      • British 150th (Army) Field Artillery Brigade Ammunition Column

    • British 179th (Army) Field Artillery Brigade [18 x 18 pounders, 4 x 4.5 inch howitzers]

      • British 383rd, 462nd, 463rd Field Artillery Batteries

      • British 464th Field Artillery (Howitzer) Battery

      • British 179th (Army) Field Artillery Brigade Ammunition Column

    • British 298th (Army) Field Artillery Brigade [12 x 18 pounders, 4 x 4.5 inch howitzers]

      • British A/298th, C/298th Field Artillery Batteries

      • British D/298th Field Artillery (Howitzer) Battery

      • British 298th (Army) Field Artillery Brigade Ammunition Column

    • 3rd,6th,12th (Army) Field Artillery Brigade Park Sections

    • 1st Heavy Trench Mortar Battery [6 x 9.45 inch heavy trench mortars]

    • Australian Corps Heavy Artillery

      • British RR Cable Section

      • British K Corps Heavy Artillery Signal Section

      • K Ammunition Siege Park

      • Z Group

        • British 14th Garrison Artillery Brigade [14 x 6 inch howitzers, 6 x 8 inch howitzers, 2 x 12 inch howitzers]

          • British 11th, 150th, 296th, 214th, 494th Siege Artillery Batteries

        • British 21st Garrison Artillery Brigade [12 x 60 pounders, 10 x 6 inch howitzers]

          • British 71st, 1/2nd Heavy Artillery Batteries

          • British 24th, 354th Siege Artillery Batteries

        • British 68th Garrison Artillery Brigade [16 x 6 inch howitzers, 6 x 8 inch howitzers]

          • British 114th, 168th, 211th, 25th Siege Artillery Batteries

      • Y Group

        • British 9th Garrison Artillery Brigade [12 x 60 pounders, 8 x 6 inch howitzers]

          • British 128th,130th Heavy Artillery Batteries

          • British 153rd,260th Siege Artillery Batteries

        • British 65th Garrison Artillery Brigade [12 x 6 inch howitzers, 6 x 9.2 inch howitzers]

          • British 115th, 202nd, 212th, 218th Siege Artillery Batteries

      • X Group

        • British 5th Garrison Artillery Brigade [24 x 6 inch howitzers, 2 x 12 inch howitzers]

          • British 160th,200th,295th,47th,374th Siege Artillery Batteries

        • British 6th Garrison Artillery Brigade [12 x 60 pounders, 12 x 6 inch howitzers, 6 x 8 inch howitzers 6 x 9.2 inch howitzers]

          • British 109th,114th Heavy Artillery Batteries

          • British 111th,245th,227th,42nd Siege Artillery Batteries

        • British 23rd Garrison Artillery Brigade [14 x 6 inch howitzers, 6 x 9.2 inch howitzers]

          • British 41st,327th,355th,94th Siege Artillery Batteries

        • British 47th Garrison Artillery Brigade [14 x 6 inch howitzers, 6 x 8 inch howitzers]

          • British 109th,146th,309th,156th Siege Artillery Batteries

        • British 51st Garrison Artillery Brigade [12 x 60 pounders, 6 x 8 inch howitzers, 12 x 6 inch howitzers, 6 x 9.2 inch howitzers]

          • British 137th,138th Heavy Artillery Batteries

          • British 169th,255th,283rd, 161st Siege Artillery Batteries

        • British 57th Garrison Artillery Brigade [16 x 6 inch guns]

          • British 222nd,312th,499th,504th Siege Artillery Batteries

  • 3rd Flying Squadron [12 x RE8 reconnaissance aircraft]

  • British 13th, 16th Captive Balloon Sections [4 Kite Balloons]

  • British F, G, H Anti-Aircraft Batteries [12 x 13 pounder Anti-aircraft Guns]

  • Australian Corps Engineers

    • Australian Corps Troops Engineers

      • 1st Army Troops Company

      • British 146th, 238th, 283rd, 567th Army Troops Companies

      • 1st,2nd Tunnelling Companies (New South Wales; Victoria and South Australia; all states)

      • British 170th, 182nd, 254th Tunnelling Companies

      • United States A, C, E, F Companies, 6th Engineer Regiment

      • British 5th Field Survey Company

      • British 11th Pontoon Park

    • Australian Corps Signals Company

      • 1st,2nd Motor Airline Sections

      • 1st, 2nd Cable Sections

      • 1st Wireless Section

      • Pigeon Carrier Service

      • Messenger Dog Service

    • Australian Corps Topographical Section

    • Australian Corps Workshops

    • British E, H Special Projector Companies

    • British 353rd Electrical Company

    • British 3rd Boring Section

    • British 6th,7th,16th,17th,29th,50th Searchlight Companies

    • British 47th, 63rd, 67th Labour Group Headquarters

      • British 1st, 14th, 15th, 21st, 49th, 47th, 74th, 83rd, 85th, 86th, 90th, 105th, 114, 168th, 173rd, 193rd, 714th Labour Companies

  • 2nd,3rd,4th,5th Divisions

  • British 3rd Motor Ambulance Convoy

  • 98th, 99th Dental Units

  • 13th Light Horse Regiment (Victoria)

  • 1st Cyclist Battalion

  • British 10th(Medium), 17th (Light), 47th (Light) Ordnance Mobile Workshops

  • Australian Corps Salvage Section

  • Australian Corps Mechanical Transport Column

    • 1st,2nd,3rd,4th,5th,6th Mechanical Transport Companies

  • British 4th Auxiliary Horse Transport Company

  • British 77th Sanitary Section

  • 1st Employment Company

Most text by Ross Mallett


Statistics : Over 35 million page visitors since  11 Nov 2002  


Email  

 Search   Help     Guestbook   Get Updates   Last Post    The Ode      FAQ     Digger Forum

Click for news

Digger History:  an unofficial history of the Australian & New Zealand Armed Forces