 |
The South African or
Second Boer War was a pivotal point in New Zealand's military history.
It involved more than 450,000 imperial and colonial troops and claimed
more than 80,000 lives.
The war was the culmination of long-standing tensions between Great
Britain, the Boer republics of the Transvaal and the Orange Free State.
In 1877 Great Britain had annexed the Transvaal, which was in a parlous
state.
In the First Boer War of 1880-81 the Boers of Transvaal rebelled
against British rule, and after defeating local British forces in a
series of engagements were granted a limited form of independence.
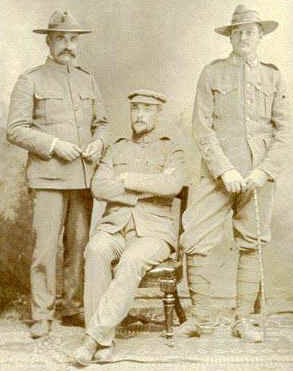
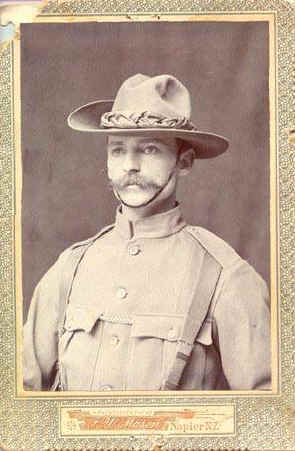
<<< 3 NZ soldiers of
the 10th New Zealand Contingent to the Boer War |
The discovery of gold in
the Transvaal in 1886 led to the influx of thousands of mainly British
Uitlanders (foreigners). The Transvaal's refusal to grant the
Uitlanders citizenship led to increasing tensions with Great Britain,
which were exacerbated in 1895 by the abortive Jameson raid.
Although
the dispute over rights of the Uitlanders was the immediate cause of the
war, it was in essence a clash between the British desire to dominate
South Africa and the Boer desire for independence.
On 28 September 1899 the
New Zealand Parliament approved a Government proposal to offer Great
Britain a contingent of just over 200 mounted riflemen to serve in South
Africa in the event of war. The British Government gladly accepted New
Zealand's offer of assistance.
|
Within a few days hundreds of men from New Zealand's tiny regular forces
and it's Volunteer Force had applied to serve in the contingent, and
were training at Karori, Wellington, when war broke out between Great
Britain and the Boer Republics on 11 October.
Commanded by Major Alfred
Robin, the contingent arrived in South Africa on 23 November and was
soon in action with French's cavalry division near Colesburg. |
 |
On 28
December Private George Bradford became the first New Zealand soldier to
lose his life in an overseas conflict when he died of wounds received in
a clash ten days earlier.
The highly mobile and
well-armed Boer forces began the war by attacking the British
possessions of Natal and Cape Colony. They besieged the towns of
Kimberley, Mafeking and Ladysmith, and in December inflicted a series of
defeats on the British in what became known as "Black Week."
The British government responded by sending it's two most famous
generals to South Africa - Field-Marshall Lord Roberts as
Commander-in-Chief and General Lord Kitchener as his chief of staff.
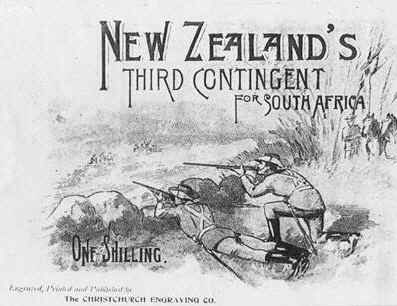
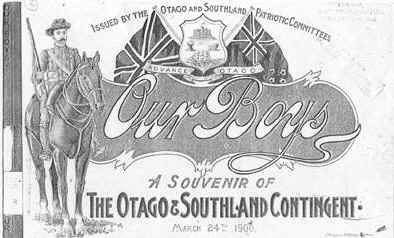
"ROUGH RIDERS"
- News of the British reverses led the New Zealand government to
organise a Second Contingent.
 |
The government also agreed to the dispatch
of a Third Contingent, largely organised and paid for by a committee of
prominent Christchurch citizens and other members of the public.
This
contingent sailed from Lyttleton on 17 February 1900, and the following
month the Fourth Contingent, raised in a similar manner by a committee
of Dunedin citizens, sailed for South Africa. These contingents were
known as "Rough Riders," because they consisted mainly of men
who were not volunteers but were good horsemen and marksmen.
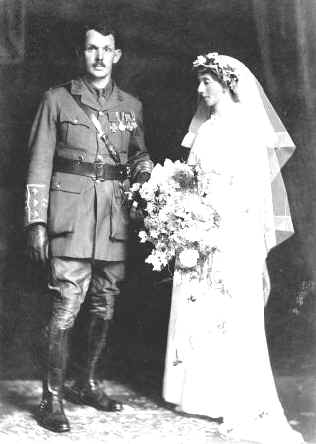
Lieutenant William John
Berry, the commanding officer of the Napier Guards Rifle
Volunteers, enlisted in the Third (NZ) Contingent on 10 February
1900. Berry was a 29 year-old saddler who was married with two
children. He sailed from Lyttelton on 17 February 1900 amid scenes
of great excitement, but fell ill shortly after his arrival in
South Africa, dying of pneumonia in Johannesburg on 10 June 1900.
New Zealand Defence Force
Archives |
In its early stages in
particular, the war enjoyed overwhelming public support in New Zealand.
Large sums were raised to organise and equip the Third and Fourth
Contingents and provide comforts for the New Zealand troops. Most Maori
supported the war, and many expressed a wish to serve in South Africa
but were, in theory, barred from serving in South Africa by the British
policy of not employing "native" troops in the conflict. In
fact, the New Zealand authorities generally ignored the British ban and
a significant number joined the New Zealand contingents.}
On 15 January 1900 a detachment from the First Contingent distinguished
themselves when they smashed a Boer attempt to seize a hill overlooking
their camp at Slingersfontein. Their gallant conduct was recognised by
the site of the action being renamed New Zealand Hill.
The same month the
reinforced and reorganised British forces took the offensive. Kimberley
was relieved by a mounted force, which included the New Zealand
contingent, on 15 February. Later in the month Roberts decisively
defeated the Boers at Paardeberg and the siege at Ladysmith was lifted.
 |
On 13 March Bloemfontein, the capital of the Orange Free State fell to
British forces which included the New Zealanders.
Private Henry Coutts
was awarded one of the four service scarves knitted by Queen Victoria
for presentation to colonial soldiers who performed acts of bravery for
rescuing a wounded comrade during a Boer ambush near Bloemfontein. |
The New Zealanders took
part in the advance through the Transvaal to Johannesburg and Pretoria,
which were both in British hands by early June. Great Britain annexed
the Orange Free State on 28 May 1900 and the Transvaal on 25 October
1900. On 29 November, the Second and Third Contingents showed
considerable bravery and had five men killed and 21 wounded in a battle
at Rhenoster Kop, east of Pretoria. This action, in which the British
forces rather foolishly and unsuccessfully attacked a Boer force
occupying a very strong position, was the last conventional battle of
the war. The bulk of the First New Zealand Contingent left South Africa
in October or December 1900.
From late 1900 those Boer
who were determined to continue their resistance to British rule split
up into smaller commandoes and adopted guerrilla tactics. They kept
control of most of the countryside in the former-Boer republics and
abandoned their heavy equipment to make their forces more mobile.
Roberts, and later Kitchener, responded by forming mobile columns to
seek out and destroy the Boer commandoes. These columns also removed or
destroyed agricultural supplies and livestock and rounded up Boer
civilians who were incarcerated in concentration camps. The Second and
Third New Zealand Contingents spent the last months of their service in
South Africa on anti-guerrilla operations, which involved arduous treks
interspersed with sniping, ambushes and skirmishes with a skilful and
elusive enemy.
DISEASE RIFE - The Fourth
and Fifth New Zealand Contingents arrived at Beira in Portuguese East
Africa between 26 April and 10 May 1900. Congestion on the railway
linking Beira with Rhodesia meant that the contingents had to spend
several weeks at camps where malaria and dysentery were rife. Many men
became seriously ill and as Lieutenant-Colonel Stuart Newall, the
Commander of the Fifth Contingent, remarked in his diary, they
"soon formed a rather sorry phalanx of warriors."
 |
The New
Zealanders spent more than two months making an arduous journey by rail
and on horseback to Bulawayo in Rhodesia and then to Mafeking.
Between August 1900 and
May 1901 the contingents fought many skirmishes and conducted a series
of arduous marches during operations against Boer commandoes in the
western Transvaal.
The most successful action was the capture of General
De La Rey's artillery, supply column and 135 prisoners on 24 March 1901.
Near Naauwport on 28 January 1901 Farrier-Sargent William Hardham
rescued a wounded comrade under heavy enemy fire.
<<< Hardham VC
For this act of
exceptional bravery Hardham became the only New Zealander to be awarded
a Victoria Cross during the war. |
The Sixth Contingent
arrived in South Africa on 13 March 1901 and was soon involved in a
series of treks through northern Transvaal covering more than 640
kilometres. Men would spend 11 or 12 hours alternately riding and
leading their horses, sleeping often in the open and surviving on hard
army biscuits and bully beef, supplemented by livestock looted from Boer
farms. Inadequate support for the mobile columns meant ragged uniforms
infested with lice, and at the end of June the Sixth Contingent staged a
"general strike" in protest.
The Seventh New Zealand
Contingent, which had been raised to replace the Fourth Contingent,
landed in South Africa on 10 May 1901. The contingent had some success
with dawn raids on Boer laagers (camps), which were an important feature
of British tactics in the latter part of the war. By late 1901 the
number of Boer guerrillas who were still active had been substantially
reduced, but thousands of the most determined and effective fighters
were still in the field.
The British authorities
in South Africa responded with a new three-prong strategy. Boer
civilians were no longer to be rounded up and placed in insanitary
concentration camps, where thousands had died of disease. Instead they
were to be left in the countryside where the guerrillas would have to
take responsibility for them. Protected areas were established which
were guarded by lines of blockhouses linked by barbed wire
entanglements. "New-model" drives were organised in which
British columns established a cordon of men right across the area and
then moved forward sweeping the Boers ahead of them towards the
blockhouse lines.
It was during the second
of the new style drives in eastern Orange Free State that the New
Zealanders suffered their heaviest losses of the war in a desperate
action at Bothasberg.
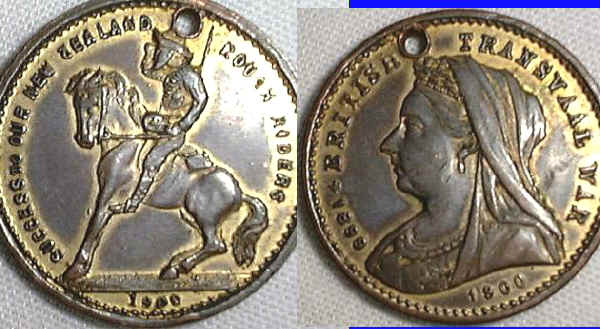 |
|
Un-official medallion issued for
the NZ Rough Riders. Originally gold plated. |
TRAGIC ACCIDENT - The
1000-strong Eighth New Zealand Contingent arrived in South Africa in
mid-March 1902. It took part in a major drive against Boer guerrillas,
and in mid-April had 16 men killed and 11 seriously injured in a tragic
rail accident at Machavie in the Transvaal. The Boers were now in a
desperate military situation, and on 31 May 1902 their representatives
signed a peace treaty with Great Britain. The Ninth and Tenth New
Zealand Contingents arrived too late to see any significant action. On 4
June 1902 Lieutenant Robert McKeich became the last New Zealander to be
killed in action when he was shot in an unfortunate clash with a group
of Boers who did not know the war was over.
Of the New Zealand units
which served in South Africa, 71 were killed in action or died of
wounds, 25 were accidentally killed and 133 died of disease. An unknown number of New Zealanders lost their lives while serving with non-New
Zealand units. More than half of the deaths were caused by typhoid fever
- "the dread enteric."
New Zealand dispatched
ten contingents with a total strength of 6,500 to South Africa. A
substantial number of New Zealanders also served in the war with other
colonial forces or with the British Army. Most of this group joined the
many mounted units specially raised for service in South Africa, but
others served in a wide variety of roles.
The New Zealand
contingents were highly regarded. The Times History of the War in
South Africa, for instance, concluded that after they had gained
some experience, the New Zealanders were "on average the best
mounted troops in South Africa."
In many ways the South
African war set the pattern for New Zealand's later involvement in the two
world wars. Specially raised units, consisting mainly of volunteers, were
dispatched overseas to serve with forces from elsewhere in the British
Empire. The success enjoyed by the New Zealand troops fostered the idea
that New Zealanders were naturally good soldiers who required only a
modicum of training to perform creditably. The war also strengthened New
Zealanders' sense of national identity, which centred on the physical and
military capabilities of the New Zealand male. At the same time the war
enhanced the ties of sentiment and shared interests which bound New
Zealand to Great Britain and the other parts of the British Empire.
By John Crawford - NZ
Defence Quarterly - Spring 1999
Extracts from: To Fight for the Empire: An
illustrated History of New Zealand and the South African War 1899-1902 by
John Crawford with Ellen Ellis - in association with the Historical Branch
Department of Internal Affairs - Reed Publishing
|