As has been previously stated, the design of the equipment admits of a variety of combinations of the several articles to suit all Arms, and the following instructions will be carefully
observed:
Set for Infantry. Plates 1, 2, 3 and 4.
(1) Fit the waist belt (a) comfortably tight by adjusting each end equally. Adjustment is made by withdrawing the double hooks (at the ends of the belt) from the loops woven inside and re-inserting them into loops a corresponding distance from each end Before re-inserting the hooks, the belt may be
tried on, and adjusted as may be necessary. Once the belt is fitted it need seldom be altered. Plate 14 shows how the hooks are inserted by pinching up
the webbing and Plate 13 shows how to fasten
the hook and loop buckle, by passing the hook S. part through the loop of the other part and not by
catching the hook over the outer bar.
(2) Slip the bayonet frog (d) over the left end of the belt
and bring it to a position so that it will hang
when the belt is put on, upon the left hip.
(3) Attach the basic pouches (c) on the outside of the belt by passing the double hooks over the upper and lower edges of the belt and inserting the hooks into
the woven loops, so that they correspond each side, in a position to bring the buckles on top of the pouches in line with the centres of the shoulders.
(4) Pass one end of the right brace (b) (without loop inside) through the loop inside the rear end of the
left brace and attach the rear ends of each brace to the respective buckle on the back of the belt.
Pass the front ends of the braces through the centre opening of the buckle on top of the basic
pouches (c), taking care not to twist the braces in doing so. Try the equipment on and make any
necessary adjustment of the braces at all four points of attachment to ensure that they extend
below the lower edge of the belt equally, this ensuring that the wide portions of the braces lie
evenly on the shoulders. Finally, pass the free front ends of the braces down behind the pouches, between the back of the pouch and the web chape
carrying the buckle, and pull down firmly. See Plate 1.
The foundation of the equipment is thus formed, and is now put on, ready for the attachment of
the haversack, which is previously fitted to suit the wearer as follows:-
Attach the tabs on the back of the haversack (f) to the movable buckles on the left and right shoulder straps (g) so that when worn the top of the haversack is approximately in line with the shoulders. Care will be taken to see that the distance between the buckles and the hooks on the fore ends is exactly the same with both shoulder straps. Taking care not
to twist the side supporting straps of the shoulder straps, attach them to the respective buckles on the base of the haversack. Now sling the haversack on to the back and
grasping the hooks on the shoulder straps lift the haversack into the desired
position on the back.
Still hold the shoulder straps
firmly and note the distance between the hooks and the buckles on top of
the basic pouches (to which the hooks are to be attached) with a view to
adjusting the lengths of the shoulder straps and the side supporting straps to bring the
hooks in line with the buckles. Take haversack off and carry out any necessary
adjustment of the straps, bearing in mind that the side supporting straps support the load and
must be adjusted fairly taut. Subsequent fitting of the haversack will not be required;
it is merely slung on to the shoulders "rucksack fashion," the hooks engaging the top bar
of the buckles on the basic pouches (c) . See Plates 3 and 15.
If the foregoing instructions are carefully carried out, the equipment will be found
comfortable and well balanced.
Set with Cartridge Carriers. Plates 5 and G.
This is assembled and fitted in exactly the same manner,
as described for the previous set, the cartridge carriers being substituted for the basic pouches. The front ends of the
braces are passed through the brass link immediately below the buckles on the extension straps of the cartridge put
carriers.
Set for Officers and
certain W.Os. and N.C.Os. Plates 8 and 9.
(1) Fit the
waist belt (a), as before described.
(2) Attach the brace attachments
(i) to the front of the belt by doubling the belt at the proposed point of security inline with the shoulders, and passing the loop thus formed
through the "gate" slide of the brace attachment; then drop the prong between the webbing and pull the belt out
flat. See Plate 12.
(3) Connect the compass pocket
(m) to the binocular case (l) by inserting the horizontal double hook on the back of the
case into the loop at the bottom (back) of the pocket. Attach the binocular case to the belt directly central over the brace
attachment by inserting the hooks into the loops woven inside the belt. Now pass the top of the brace attachment
underneath and through the narrow horizontal web loop on the back (top) of the compass
pocket.
(4) Connect the ammunition pouch (k) to the pistol case (j)
as previously described for the compass pocket and binocular case, attach the pistol case to the belt, pass the brace
attachment under and through the narrow horizontal web loop on the back (top) of the ammunition pouch.
(5) Pass one end of the
right brace (b) (without loop inside) through the loop inside the rear end of the left brace (b) and
attach the rear end of each brace to the respective buckle on the back of the belt. Pass the front ends of the braces through the middle opening of the respective brace attachment buckle, then tinder the horns of the buckle, and for the time being leave the ends of the braces outside the pocket and pouch.
Put the equipment on and effect any necessary adjustment to the front and rear ends of the braces through the respective buckles, taking care that all four adjustments are made equally to bring the wide portions of the braces evenly on the shoulders. Now take the equipment off and secure the front ends of the braces in the following manner
Pass the end of each brace through the rectangular brass link of the brace attachment above the horizontal web loop
on the back of the pocket (and pouch), pulling it through as far as it will come then pass it back again through the brass link below the web loop, and pull down between the back of the binocular case (and pistol case) as tight as possible, thereby firmly securing the pocket (and pouch) to the brace
attachment. See Plates 12 and 8.
(6) The equipment is now ready to put on, and the haversack with shoulder straps, fitted as previously described., is put on separately and connected to the brace attachment buckles by means of the shoulder strap
hooks.
Set for Personnel armed with Pistol only. Plates 10 and 11.
Fit the waist belt (a) attach the brace attachments 0) to the front, and the rear ends of the braces (b) to the buckles on the back of the belt. Pass the front ends of the braces throu0i the centre opening of the buckles at the top of the brace attachments, and secure. See Plate 7.
The pistol case (i) and ammunition pouch (k) are attached to the belt, each centrally over the brace attachment, by inserting the hooks on the back of these articles into the loops woven inside the belt, the pistol case being on the left side and the ammunition pouch on the right side. See Plate 10.
Adjustment of the braces will be made equally at all four points of attachment,
The haversack with shoulder straps is fitted as previously described, and put on separately and connected to the brace attachment buckles by the hooks oil the shoulder straps. See Plate 11.
From the foregoing explanatory matter, it
will be seen that the articles attached to the waist belt in front may be varied as desired, e.g., the pistol case with ammunition pouch above may be worn on the left side and a basic pouch on the right side
without brace attachment).
For changing stations the 1908 Pattern pack (o) and two supporting straps (p) are employed. It is then necessary to detach the shoulder straps from the haversack, and to carry the haversack at the left side by attaching the ends of the braces extending below the belt to the buckles on the sides of the haversack. The
water bottle in carrier is then taken out of the haversack and carried on the right side of the equipment, the two buckles on the carrier being secured to the ends of the braces.
The shoulder straps (detached from the haversack) are used for the carriage of the pack, as follows:
With the pack filled, and the flap closed down tightly, pass the supporting straps through the loops on the base of the pack so that the buckles are close to the loops, cross them over the pack and secure to the buckles at the top of the back of the pack. Take the shoulder straps
normally leaving the movable buckles in the same position as when used with the haversack) and attach them to the tabs on the back of the pack by means of the movable buckles. Now attach the side straps to the buckles of the
supporting straps at the base of the pack.
First put the equipment on, then sling the pack on to the shoulder and note whether the side straps are correctly adjusted; they must be fairly taut to support the weight carried, so that the pack does not hang below the
waist belt. See Plate 16.
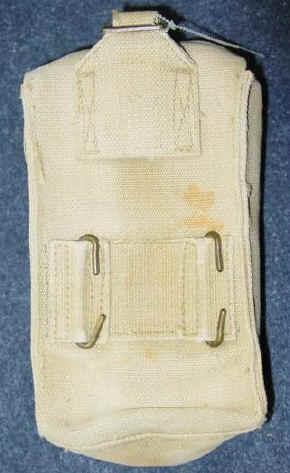
Utility Pouches (g).-These are carried, filled, in regimental vehicles, and are slung over the personal equipment when going into action. The front and rear pouch will be ready connected together by means of the yoke (r). as shown in Plate 17. The long narrow strap on the back of the front pouch which passes through the loop on the back of the rear pouch. is secured round the waist to hol(I the pouches-in the position shown in Plates 18 and 19. If necessary, the yoke will be adjusted to suit the physique of the wearer.
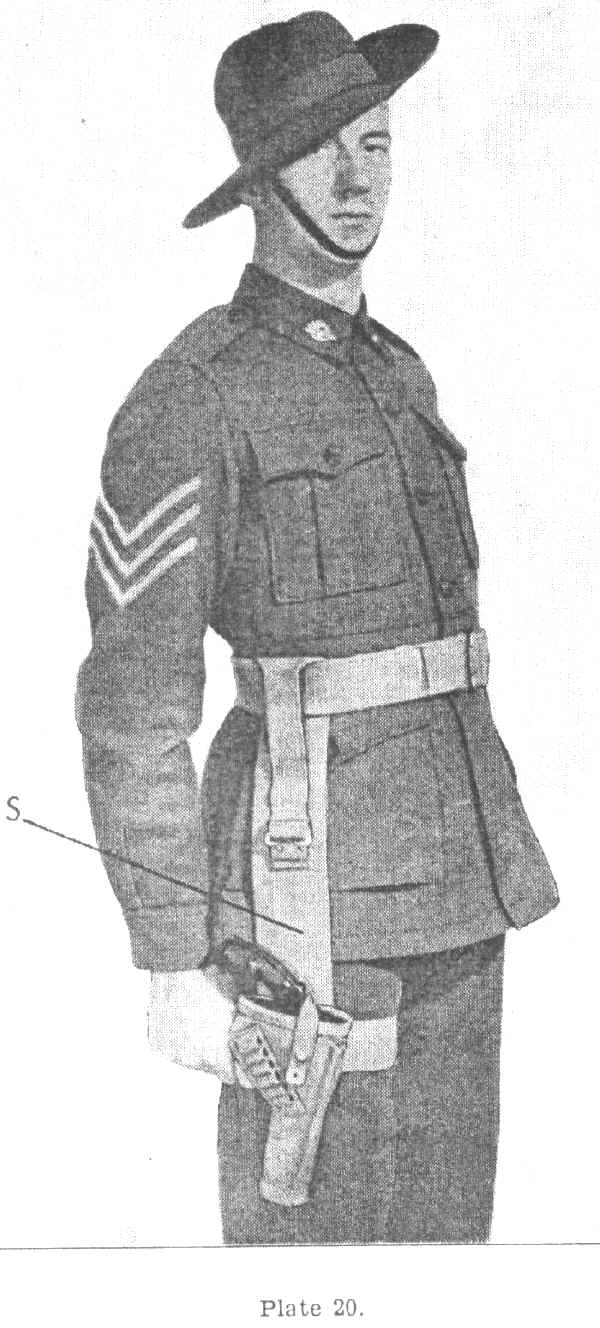
Set for Royal Armoured Corps and R. Signals personnel employed with those Units.
The pistol case (s) is suspended from the
waist belt on the right side and strapped round the leg as shown in Plate 20.
The haversack (f) is carried in armoured vehicles.
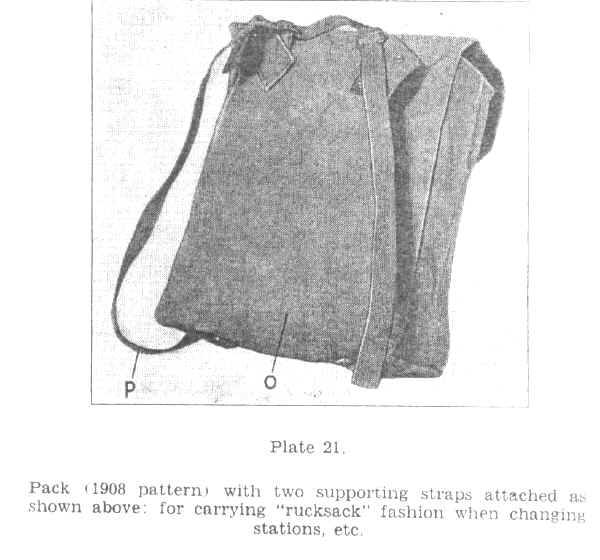
The pack (1908 Pattern) (o) with two supporting straps (p), attached as shown in Plate 21, for carrying "rucksack fashion" is used when
changing stations, etc.
|