Click to escape. Subject to Crown Copyright.
Category: Battles/WW2

Click to go up one category

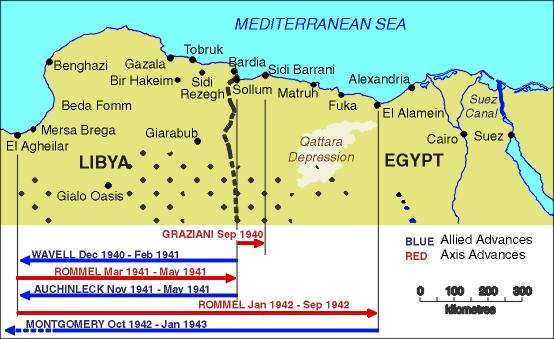
The SIEGE of TOBRUK April 1941 December 1941

In the weeks leading up to 9 December 1941, lighters and barges laden with Australian troops slid silently from the battered waterfront of Tobruk. Not a man of them spoke as the ghostly flotilla maneuvered to the sides of waiting warships.

They were Australian troops being evacuated from the Tobruk garrison. The Australian garrison had been relieved after a siege of more than 240 days during which the name of Tobruk had been written in glowing colours in the annals of Australian courage and determination.

Tobruk Memorial ANZAC Ave Canberra ACT

For eight months, with a ring of steel, the gallant AIF had barred the advance of a hitherto all-conquering German Army. 

In their fortress of dust and death, they had carried the fight to the German flank, defying the most intensive dive-bombing barrages in martial history.

News that the garrison had been relieved was received in Australia with joy, but it was joy tinged with disappointment that the heroic band was not to have the supreme reward of marching out to share the triumph of the Imperial troops in their second drive across Libya.


Rats of TOBRUK Memorial Canberra

The soil of Tobruk must be forever Australian. Australians, backed by British artillery and tanks, captured the fortress in the first Allied drive through Cyrenaica (Libya), and Australian troops, again backed by British artillery, held it against as great odds as have been faced by any garrison in history. The very dust of its bomb-pocked perimeter is hallowed with Australian blood, and Australian dead lie in its windswept cemetery.

The story of the Tobruk garrison begins in April 1941 when the Germans, striking with unexpected speed and mechanized strength, thrust the Imperial Forces back from Benghazi and across the Cyrenaican plains to the Egyptian frontier. 

  • The part of the story that sometimes gets lost in the bigger saga of the Siege is the fact that Australians helped capture Tobruk in the first place. They evicted Mussolini's "famous" defenders with little trouble. This is the town's official flag, liberated from the Town Hall.

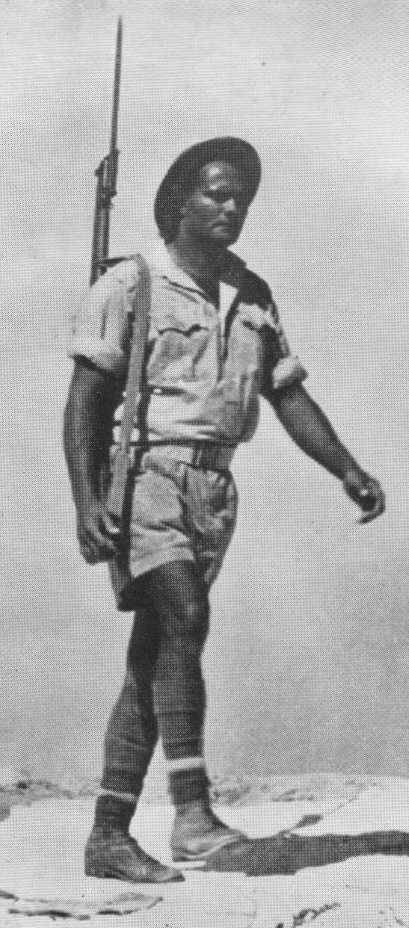
Cut off from their main forces, the AIF fell back on Tobruk, retired behind its strongly fortified perimeter and established the ring of fire and steel on which successive waves of German shock troops were shattered.

A big white town, with a peacetime population of about 5,000 people, Tobruk lies at the end of a bay about one mile wide and two miles long. It was planned and built as a garrison town, for there can be no other reason for its existence in arid, treeless country supporting only a few camels, goats, and gazelles. Through the town runs the single bitumen road that crosses Cyrenaica.

Men of the 2/13 Battalion on the perimeter. Note the total absence of geographical high points. The land was very flat in most cases.


The ring of strong-posts which the Italians built around Tobruk is about 26 miles (45 kilometers) long. Each flank rests on the sea, and for three or four miles (five to seven kilometers) from the coast the posts defending the flanks are on the inner side of bare, precipitous wadis. Each strong-post is a labyrinth of concrete-sided trenches and there are concrete emplacements for anti-tank guns and machine-guns within the posts.

This, then, was the fortress town to which the AIF was to cling through the heat in blinding sandstorms of a North African summer - a poisonous thorn in the flank of the enemy.


The strategy of Major General L J Morshead, of the Tobruk garrison, was simply this: to hold the town at all costs, and, by offensive forays, to force the enemy to divert greatly superior forces to hold a dangerous threat and thus weaken his drive against Egypt.

It was in the heat and dust of Tobruk that Australian tenacity and courage achieved its supreme expression. Air raids which had gone into the thousands before unofficial statisticians lost count had no more effect on members of the garrison than the enemy's artillery, strafing and attacks by tanks.

Click for enlargement. Click Icon for SUPER enlargement. The siege was only a couple of months old when the renegade Lord Haw Haw, broadcasting from Berlin, said they were "caught like rats in a trap" and applied it to the garrison because most of its men could find shelter only underground while the bombers were overhead. Our men accepted the title with relish. To one another, they were "the rats." To the Axis they were rats with razor-sharp teeth. They became "The Rats of Tobruk"

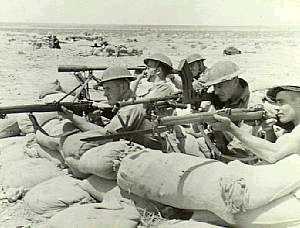
In the first phases of the siege the Australian garrison, concerned primarily with testing its strength, concentrated on defence. But as the troops proved their ability to repel thrust upon thrust by Germans and Italians, defence gave way to fierce aggression as the world's most daring patrol fighters went into action each night.

Tobruk patrols were of two types - fighting and reconnaissance. The job of the reconnaissance patrol was to gather information and, if possible, to secure prisoners for identification. Its members used all their bushcraft to avoid being discovered. Like stealthy shadows, they saw without being seen. But the fighting patrol went out to fight. Its aim was to do as much damage and to kill as many of the enemy as possible. Its members would creep up on an enemy post, surround it and then, at a given signal, rush in with the bayonet and kill-soundlessly A few brief minutes of bloody, sinew-straining work and the foray would be over, with not a shot fired.

So persistent and so deadly were the Australian night patrols that the enemy, living in the perpetual shadow of silent, stealthy death, was soon reduced to a state of almost panicky nervousness. On the slightest provocation, and often on no provocation at all, he would put down artillery and mortar barrages.

Two typical examples of AIF offensive patrols are quoted. In the first, the raiders crawled in single file for two miles through a minefield to attack an observation post, the position of which had been revealed by reconnaissance patrols on the previous day.

The patrol started on its journey after midnight and was preparing for the final assault when Very lights lit up the scene, and the enemy post opened fire with rifles and machine guns. Five of our men then charged in with bayonets, Tommy guns, and grenades. Despite a volley of hand grenades from the enemy, the patrol stormed on, killing 15 and wounding many of the estimated 50 enemy before crossfire from supporting posts forced a withdrawal. The patrol regained its own lines, suffering only slight casualties.

The second classic patrol won for its leader, Lieutenant William. Horace Noyes, the Military Cross. With an NCO, Lieutenant Noyes stalked and destroyed three light tanks and led a bayonet attack against the enemy garrison. His unit captured the post and killed or wounded the garrison of 130, as well as the crews of seven machine-guns and 11 anti-tank guns and their protective infantry. It also damaged a heavy tank.

Click for enlargement. Click Icon for SUPER enlargement

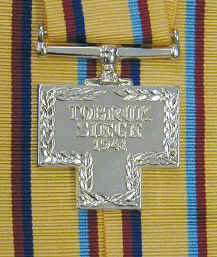
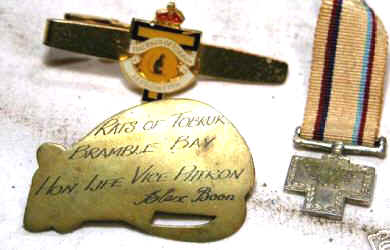
Throughout the siege the AIF garrison operated with a perfect team work that ran from the front-line soldier, back through his immediate headquarters to the artillery, back to the higher formations, to the supply and ordnance workshops, and to the hospitals. In the entire garrison there was not one idle mouth to be fed.

And throughout the eight bitter months of heat and dust and blood and flies, the garrison retained those high spirits that are the hallmark of high courage. If Lord Haw Haw thought he could goad the Australians with his bitter tilt at the "Rats of Tobruk" he committed the grossest of his many misjudgments. 

The men were proud of the title and some of them now treasure an unofficial medal, bearing the stamp of a rodent rampant, which was unofficially struck to commemorate the defence of Tobruk. see below left

That medal was fashioned from aluminum taken from the fuselage of a German bomber brought down by the anti-aircraft fire of the sharpest-teethed rats in history. Below right is a newer commemorative medal issued by the Association in 1977

1st Rats of Tobruk medal (copy)


This medal  issued by the Rats of Tobruk Association. That makes it un-official. It is however recognised.

 The ribbon is khaki with light blue and maroon stripes.

Tobruk Siege 1941 Medal (unofficial)

And so, after months of indomitable fighting, the "Verdun of the Desert" was relieved and the British Navy's perfectly executed evacuation maneuver wrote the final chapter of an epic that must always rank among the finest achievements of Imperial arms.


But there were some of that heroic band who could not answer the evacuation order. Their release had come earlier. They lie in the little war cemetery near the Bardia Road. A simple concrete memorial, about 25 feet (seven and a half meters) high and of chaste design reminiscent of the Cenotaph, stands at the entrance. Its only ornament is a cross and below is a marble slab bearing the words:

This is hallowed ground, 

for here lie those who died for their country.

At the going down of the sun,

and in the morning,

we will remember them.


Australian Obelisk, Tobruk War Cemetery, Libya.

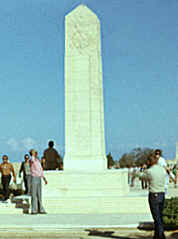
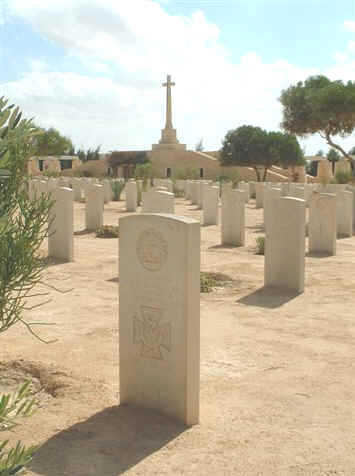
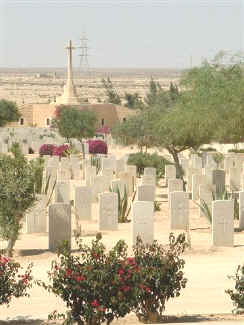
Images of Tobruk Cemetery by Michael D Booker Marhaba Tours
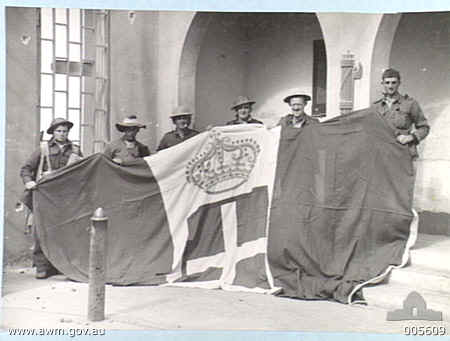
Australian units at Tobruk.
April - December 1941

9th Infantry Division
HQ Signals and Intelligence Services

20th Infantry Brigade
HQ and Signal Section
2/13th Battalion
2/15th Battalion
2/17th Battalion
20th Anti-tank Coy

24th Infantry Brigade
HQ and Signal Section
2/28th Battalion
2/32nd Battalion
2/43rd Battalion
24th Anti-tank Coy

26th Infantry Brigade
HQ and Signal Section
2/23rd Battalion
2/24th Battalion
2/48th Battalion
26th Anti-tank Coy

18th Infantry Brigade (attached)
HQ and Signal Section
2/9th Battalion
2/10th Battalion
2/12th Battalion
16th Anti-tank Company


Royal Aust Engineers
HQ
2/3rd, 2/4th, 2/7th, 2/13th Field Companies
2/4th Field Park Company
2 / 1st Pioneer Battalion

Royal Aust Artillery
2/12th Field Regiment
3rd Anti-tank Regiment
8th Light Anti-Aircraft Regiment

Aust Army Service Corps
HQ
9th Div Supply Column
9th Div Ammunition Column
9th Div Petrol Column
7th Div Supply Column
Composite Company AASC (in the Red Line)

Aust Army Medical Corps
4th General Hospital
2/2nd Casualty Clearing Station
2/3rd, 2/5th, 2/6th, 2/11th Field Ambulances
Bacterial Laboratory, Ophthalmic and Stores Units

Other Australian Troops
2/4th Field Hygiene
4A0D
9th Div Provost Company
Div Postal, Salvage and Employment Units

ORGANISATION OF AUSTRALIAN FORCES AT TOBRUK.
by Malcolm G Wright

BASIC ORGANISATION OF AN INFANTRY BATTALION.

This was commanded by a Lt. Colonel. It comprised a HQ company and four Infantry companies, each commanded by a Captain although the HQ Coy was often commanded by a Major. At full war strength a Battalion was of 36 officers and 812 other ranks.

The HQ Coy had 6 Platoons.
A mortar Platoon with two 3" Mortars and 4 Universal Carriers.
A "Carrier Platoon" with 10 Universal Carriers each armed with a Bren gun.
A Signals Platoon. Usually with a Radio truck & two or more Universal Carriers.
A Pioneer Platoon.
An Anti Aircraft Platoon. (Armed with Bren Guns)
A Transport, HQ and administrative platoon.

Each of the Four Infantry Companies had three platoons.
A Platoon comprised a small HQ with a 2" Mortar and a .5" Boyes Anti Tank Rifle. It also had three Infantry sections.
Each section was of ten men. They were armed with a Bren Gun, an Owen Submachine gun , and eight rifles.

***NOTE*** 

Because of the huge amount of captured Italian equipment a section often had up to two or three Italian 'Breda' Light Machineguns and a few Italian sub Machineguns. Italian rifles were never used as they were inferior to the British .303 Short Lee Enfield.

ORGANISATION OF BRIGADES AND 9th DIVISION.

Each Brigade comprised 3 battalions. A Brigade usually had a small HQ which often included an anti tank section with one or two 2pdr guns. Because of the large number of Italian 47mm guns captured, there were usually more of these available than 2pdrs and all battalions had several times the number of guns they were supposed to have.

The 9TH DIVISION was charged with the defence of Tobruk. It was commanded by Major General Sir Leslie Morshead. His 'nick name' was "Ming the Merciless". This was a famous Chinese character in a stage play and noted for being very hard and tough. 

He was, never-the-less, very much liked by the troops. In WW1 he had served at Gallipoli as a Captain of the 2nd Battalion AIF. Later in France he went on to command the 33rd Battalion, was wounded twice and became a Lt. Colonel before the war ended. He won the DSO, the Legion d'Honneur and was mentioned in dispatches on six occasions.

  • 20th BRIGADE Was commanded by Brigadier John Murray. It comprised the following battalions. 2/13th, 2/15th and 2/17th.
  • 26th BRIGADE Was commanded by Brigadier Ray Tovell. It comprised the following battalions. 2/23rd, 2/24th and 2/48th
  • 24th BRIGADE Was commanded by Brigadier Arthur Godfrey. It comprised the following battalions. 2/28th and 2/43rd

NOTE. The 2/32nd was in Egypt and did not arrive (by ship) until May 4th.1941.

ATTACHED.

  • 18th BRIGADE of the 7th Australian Division. It comprised the following battalions. 2/9th, 2/10th and 2/12th
  • 18th INDIAN CAVALRY REGIMENT. (Actually motorised infantry)
    2/3rd (Australian) Anti Tank Gun Regiment. (Minus the 12th Battery)
    2/1st (Australian) Pioneer Battalion.
    1st (British) Royal Northumberland Fusiliers. A Machinegun Battalion. (Armed with Vickers Machineguns).
    1st (British) Kings Dragoon Guards, with 30 Marmon Harrington Armoured Cars.
    One battery of the 3rd Royal Horse Artillery. (British) Anti tank gun unit with 2pdrs.
    4 British 25pdr artillery Regiments. 1st Royal Horse Artillery.
    'Bush Artillery'. This was a group of cooks, supply troops, HQ staff etc. who manned a whole range of captured Italian field artillery, anti tank and AA guns. They carried out their normal duties, but manned their guns during attacks. Their weapons included an old Italian 149mm gun in a coastal emplacement.
  • 3rd ARMOURED BRIGADE.
    5th Royal Tank Regiment. Colonel H.D.Drew.
    1st Royal Tank Regiment.
    4 Matilda Tanks, 23 A9 Cruiser Tanks, 20 Vickers Mk. VI tanks. More Matilda tanks were later shipped in and many Italian Tanks were also used. The Australians operated both the Italian M11/3 and M13/40 Medium tanks, making them the third Commonwealth nation (Britain and South Africa being the others) to put these captured vehicles to good use.

**NOTE**

Large amounts of equipment captured from the enemy was used. The ammunition bunkers at Tobruk were full of Italian ammunition. None the less, many raids were carried out on the Italian troops to gain more equipment. For example many of the captured Italian guns lacked sights, so the troops raided the Italian lines, took some of their batteries, removed the sights and destroyed the guns. Also the majority of anti tank mines were obtained by digging up Italian and German mines by night. On one night alone they dug up 500 such mines and re-located them.


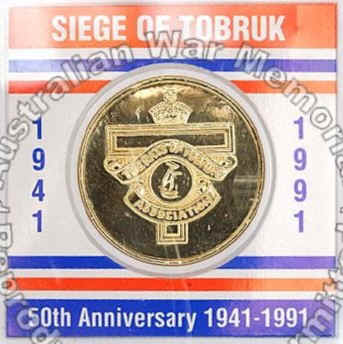
50th Anniversary Medallion in a sealed case organised by the RoT Association in 1991

Badge worn by Polish troops at Tobruk?


Statistics : Over 35 million page visitors since  11 Nov 2002  


Email  

 Search   Help     Guestbook   Get Updates   Last Post    The Ode      FAQ     Digger Forum

Click for news

Digger History:  an unofficial history of the Australian & New Zealand Armed Forces