Bullecourt is perhaps the
First World War battle that engendered the greatest
distrust and contempt in
Australian troops for their British commanders. Sandwiched between, and
sometimes overshadowed by, two of the best-known Australian actions of
the war - Pozières (July-August 1916) and Passchendaele (October 1917)
- Bullecourt did not involve the level of casualties of these two, but
it nevertheless resulted in huge losses for the Australian divisions
involved.
 |
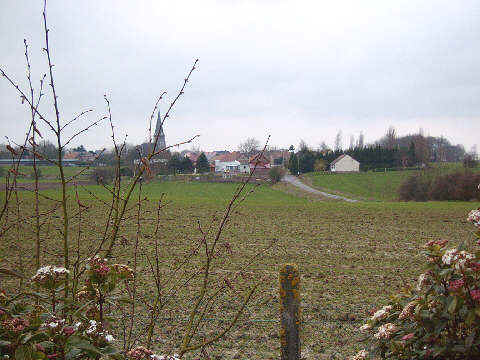
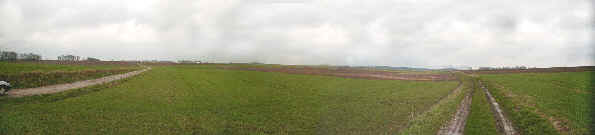
| From the Sunken Road the 4th
Australian Division were attacking up this hill. Riencourt is on
the right. On the skyline and to the left of the tracks in the
field is where the Digger memorial stands. |
The one-day affair which was the First
Battle of Bullecourt (11 April 1917) resulted in the 4th Division being essentially
wiped out as a fighting force for months.
This single day caused great bitterness among Australians towards
General Hubert Gough and the newly-developed tank weapon, as a result of
that general's willingness to throw resources into untried tactics
against the Germans' Hindenberg Line - perhaps the strongest defensive
position of the entire Western Front.
Gough, the brilliant but impetuous
commander of the Fifth Army, allowed himself to be convinced that Mark I
and II tanks could be used to clear a path for his attacking infantry,
in lieu of the usual very heavy artillery barrage. Although these
vehicles lacked armour-plating and were only meant for training, they
were expected to proceed across no man's land and flatten the immense
lines of barbed wire laid out in front of the enemy trenches.
Despite the misgivings of Australian
commanders, Gough insisted that
the attack go ahead in this way. Even with evidence of the unreliability
of the tanks, which failed to get within one mile of the jumping-off
point by the time the attack was first scheduled, Gough immediately
decided to reschedule the attack for the following morning!
In the event, only four of the eleven
tanks were in position at start time, and these were so slow over the
heavy going that they were passed by the soldiers on foot before
reaching the German defences.
The 4th and 12th Brigades of the 4th
Australian Division, despite the failure of the tanks, showed remarkable
courage and ability and achieved what most observers believed was
impossible, by breaking into part of the enemy trenches.
They were, however, forced out within
hours by murderous machine gun and artillery fire from the defenders
who, because of confusion and simple
bad planning by the Australian artillery,
were able to inflict enormous losses on the troops that reached and
lodged in the Hindenberg Line.
The high degree of bitterness that
resulted can be understood when the casualty rates of First Bullecourt
are studied.
- The 12th Brigade went in 2,000
strong and suffered 950
casualties.
- The 4th Brigade attacked with 3,000
and sustained 2,339
casualties!
Even by the standards of the Western
Front at this time, a loss rate of 66 per cent was remarkable. No wonder
the 4th Division was withdrawn and took no further part in action for
months. Included in the casualties were some 1,250 men who were
captured, approximately a third of all Australians made prisoner during
the war.
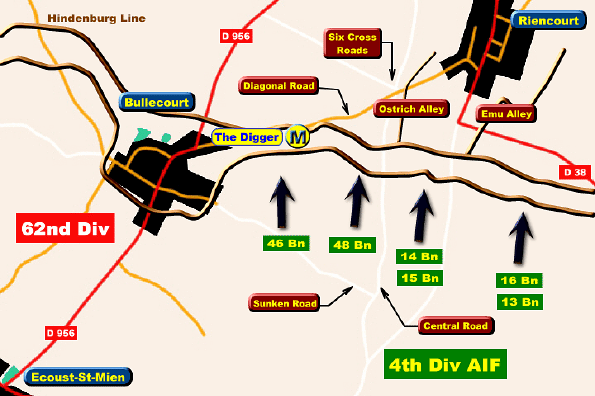
Second Bullecourt was a more
conventional but even more ferocious action that began on 3 May and
lasted for more than a fortnight.
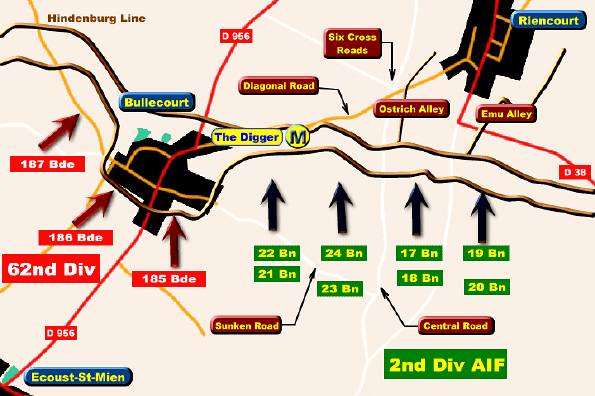
 |
| This is the view looking up the
Central Road with the Sunken Road on the left. 5 Brigade were
attacking on the right and 6 Brigade on the left of the Central
Road. |
Some factors not always considered by
Australian readers. It is able to convincingly demonstrated that during
both battles Australian artillery let the attacking infantry down
(Charles Bean had forecast that this would happen). Two classic examples
are 1. During the few hours that was First Bullecourt, artillery
headquarters continually refused requests for support due to confusion
about the location of Australian troops. This allowed the German gunners
and machine-guns to operate at will. When the artillery did finally open
up, their fire landed directly on the Australian positions. Worse, the
pre-battle fire plan had ignored the problem of very heavy machine-gun
and battery concentrations in front of, and on each flank of, the
attacking troops. Preliminary bombardments would have had at least some
affect on these German defences.
 |
Incredibly, in preparing for Second
Bullecourt, the fire plan completely ignored one of the major factors in
the failure of the first operation: the flanking machine-gun fire
brought down from the neighbouring village of Quéant. In the event, the
5th Australian Brigade was heavily mauled by these guns when they veered
off line and came into the view of the Quéant defenders. This part of
the attack collapsed and the 5th Brigade withdrew without ever reaching
the Hindenberg Line.
It is also possible to demonstrate
that Australian staff work was often poor. When the decision was taken
to cancel the attack on 10 April, due to the non-arrival of the tanks,
this information was not passed on to the neighbouring 62nd (West
Riding) Division. British patrols were consequently sent into Bullecourt
village which were quickly mauled by German machine gun fire. This
so-called "Buckshee Battle" of 10 April cost the 62nd Division
162 men. Bitterness was, therefore, not only on the Australian side.
The main effort to take Bullecourt
village was very much a British action; Australian units attacked to the
east of the village across open fields. Detailed descriptions of British
undertakings over the period of a fortnight, and in the face of
ferocious German counter-attacks, demonstrate very clearly that these
units fought with the same courage and tenacity as the Australians (and,
incidentally, the German defenders, who fought for every inch of
ground).
Exploration of the backgrounds and
relationships between senior British commanders, and of the intricacies
of the British-French alliance, helps to explain why approaches were
adopted which appear on the surface to be indefensible. Gough is the
dashing ex-cavalryman, demanding that his subordinates demonstrate the
"offensive spirit", always with an eye on the far horizon and
the "big push", and desperate to capture Bullecourt to ensure
that Haig's offer of command of the Flanders campaign is
confirmed.
Haig, also ex-cavalry, is determined
that Flanders will proceed. He urges Gough to continue his attacks on
Bullecourt to demonstrate to the French that British forces are
continuing to apply pressure to the Germans and thereby retain French
support for his plans. Pity the poor soldiers who, as a result, became
casualties.
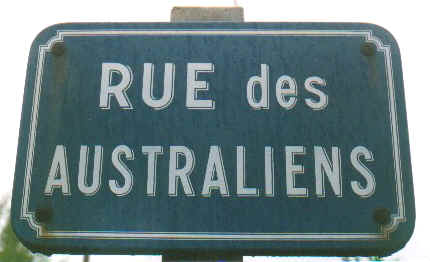
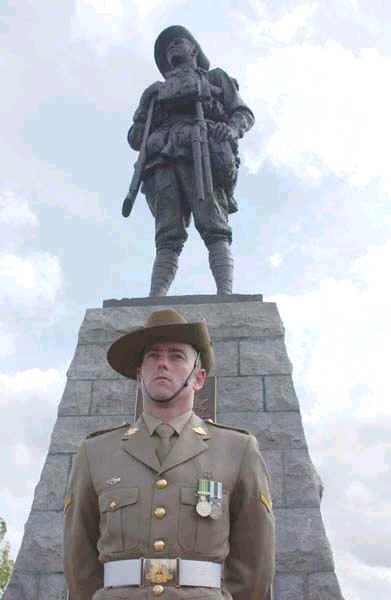
Street sign in
Bullecourt 2002
Based on http://www.awm.gov.au/journal/j36/bloodtub.htm
by Graeme BEVERIDGE, Executive Officer, Australian War Memorial
Photos and maps from http://www.webmatters.net/index.shtml |