|
The Aim
The losses on the
Western Front in the early months of war in 1914 and 1915 were far
higher than each warring nation had anticipated. After early German
advances in Flanders, a virtually stationary Western Front ran from the
English Channel to the Alps and thousands of lives were required for
advances measured in yards. An alternative way of waging war against
Germany and Austria-Hungary seemed highly desirable to the Allies,
especially since it seemed likely that other states would enter the
fray, Greece and Italy to join the Allies and Turkey and Bulgaria the
Central Powers. The 'Young Turk' leaders in Constantinople decided to
ally with Germany. They opened the Dardanelles to German warships, which
bombed Russian Black Sea ports before the formal Turkish declaration of
war. In this context the Dardanelles, or Gallipoli, campaign was
conceived. Its leading advocate, Winston Churchill, then first Lord of
the Admiralty, was convinced that the Dardanelles Straits could be
forced, Constantinople captured, Turkey knocked out of the war, Greece
and Italy encouraged to enter on the Allied side, and aid given to the
hard-pressed Russian and Serbian forces. 
|

|
 |
|
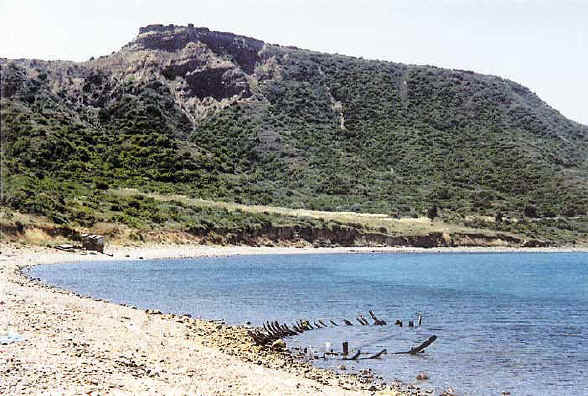
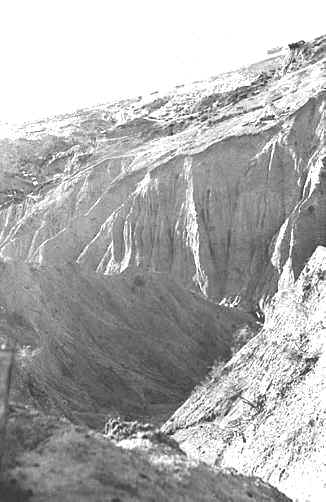
North Beach Gallipoli 1915 & 2002 |
Formation of ANZAC
Before 1914, all major
political parties in Australia supported military training for young
men. Labor leaders such as Billy Hughes, born in London, and John
Christian Watson, of Scottish descent but born on board ship in
Valparaiso Harbour, Chile, were ardent supporters of the Australian
National Defence League. In his recent Soldier Boy: The True Story of
Jim Martin the Youngest Anzac, Anthony Hill explains how young Jim
was imbued at school with pride in being part of the British Empire and
was keen to join the military training scheme for boys of twelve and
above. Jim enlisted at 14, giving a false age, and had not reached his
fifteenth birthday when he died of typhoid fever in a hospital ship off
Gallipoli in October, 1915.
When war broke out,
the Labor leader, Scotland-born Andrew Fisher, supporting the
England-born Liberal Prime Minister, Joseph Cook, declared that
Australia would stand beside the mother country to help and defend her
"to the last man and the last shilling". About 40 per cent of all
Australian males aged between 18 and 45 voluntarily enlisted to serve in
the Australian Imperial Forces (AIF), that is about 417 000 men, of whom
about 60 000 died in all campaigns and another 160 000 were wounded or
maimed. At least a quarter of the Australian volunteers were born in
Great Britain and Ireland, Robert Rhodes James's estimate being 35 per
cent. About 98 per cent of the rest were of British or Irish origin. The
immigration rate from the United Kingdom was exceptionally high between
1910 and 1914. 'Simpson' - 'the man with the donkey' was John Simpson
Kirkpatrick, a recent Geordie emigrant.
'Rule Britannia',
'Soldiers of the Queen' and 'Sons of the Sea' were sung at recruiting
offices in Adelaide and Sydney, Wellington and Christchurch, as loudly
as in Birmingham or Glasgow. In 1914 and 1915 there was little
difference between the volunteer rate in Australia of Protestants and
Roman Catholics of Irish descent, but the number of Irish volunteers
fell sharply after the 1916 Easter Rising in Dublin and after Cardinal
Mannix, Archbishop of Melbourne, took a leading part in opposing
conscription in the referenda of 1916 and 1917.
In 1915 almost all
Anzac troops considered themselves part of a wider British people and
wanted to be regarded as British, not only as Australians or New
Zealanders.
 |
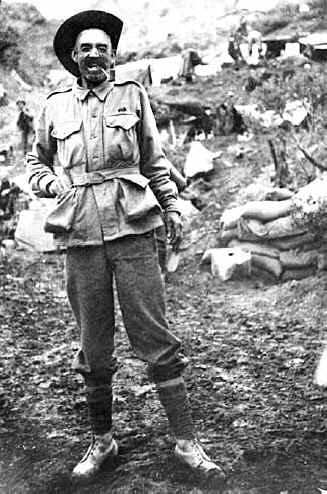
<< Anzac Cove 1915
When Australian units were photographed in Egypt they
usually chose themselves to wear the standard British pith helmet.
Most
Anzac units landing at Anzac Cove wore British-issue caps, but when
after the war George Lambert was commissioned to paint that scene he was
instructed to show them with slouch hats. |
The Australian forces
soon made themselves distinctive. One example of Australian ingenuity
was Lance-Corporal Beech’s periscope rifle invention which
enabled gunners to fire without putting their heads above the trenches.
Two British generals, Walker and Birdwood, made important contributions
to Anzac successes but their role was played down by Charles Bean and
some other Australian historians in order to elevate the role of Monash,
an excellent planner but an indifferent commander in the field. Birdwood
and Walker tightened discipline among the Australians without alienating
them or reducing their aggressive spirit.
|
|
|
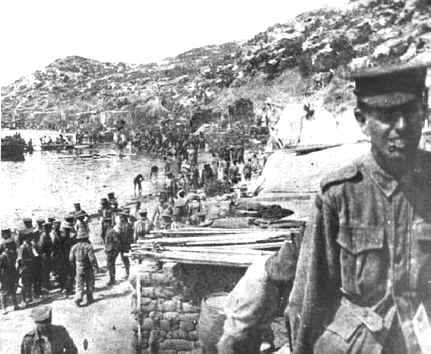
The Anzac piers with The Sphinx
in the background |
Some Australian troops
considered British regiments stuck too much to regulations when
encamped, whereas some British troops thought Australian regiments made
bad conditions worse by lack of attention to routine. Birdwood admitted
to Lord Kitchener, Secretary of State for War, that, although 'my men
are A1 in attack', they are 'curiously callow, and negligent, and the
only thing I fear is a really heavy night attack ... as I cannot get the
men to bestir themselves and hurry up to repulse an attack at once'. The
Australians were usually distinguished by boldness in attack, the
British by discipline in retreat. The New Zealanders were widely
thought, not just by themselves, to possess both Australian and British
virtues in warfare. Perhaps the most remarkable individual achievement
of the campaign was that of Lieutenant-Commander Bemard Freyberg, awarded the
DSO for swimming naked in an ice-cold sea for two miles to light flares
on the coast at Bulair. Freyberg later gained the VC in France and
became Governor-General of New Zealand, among other distinctions. The
epitome of Australian guts was Albert Jacka, who killed seven Turks in a
single engagement and was awarded the VC.
The Naval Campaign
The directive that
'The Admiralty should prepare for a naval expedition in February to
bombard and take the Gallipoli peninsula with Constantinople as its
objective' was later derided by opponents of the plan, but it came close
to success. Reports recovered later from the Turkish staff revealed that
on 19 March nearly all the Turkish ammunition was expended and that 'A
naval attack executed with rapidity and vigour might have been
successful.' The Gallipoli campaign proved more than once that often a
small group, even one person, may make a great difference to mighty
issues. The mines of a single Turkish mine-layer had a powerful effect
on the naval battle, more perhaps than shells from all the Turkish
guns.
British minesweepers,
manned by civilian crews, refused to continue to clear the mines whilst
under Turkish shell-fire, and that proved a crucial failure. After the
sinking of HMS Irresistible and the French ship Bouvet and
severe damage to the French ships Gaulois, Suffren and Charlemagne and
to HMS Inflexible, Agamemnon, Lord Nelson, Albion, Admiral Carden
called off the attempt to enter the Straits. Carden feared that his
ships could not deal with the Turkish guns until the mines were cleared,
but that the mines could not be cleared so long as the Turkish guns were
intact. Under Carden or his replacement, Admiral de Robeck, the Allied
fleets never tried to force an entry into the Sea of Marmara, even when
thousands of troops were fighting on the Gallipoli Peninsula.
When ships' gunners
could get a sight of Turkish positions, they were generally accurate and
effective, with the result that few Turkish officers would risk an
advance across ground vulnerable to their fire. Inevitably, there were
some instances of 'friendly fire', the most devastating being when a New
Zealand battalion close to breaking through the Turkish lines was
shelled from a British warship and forced to retreat to better cover,
but overall the ships ensured that the army's artillery, often seriously
short of ammunition, was able to compete with Turkish fire.
However, a significant
reason for Allied failure during the land fighting of 1915 was poor
co-ordination between the British Army and Royal Navy, although
co-ordination between General Sir Ian Hamilton and his subordinate
military commanders was not much better. Especially weakening was
division at the very head of the Royal Navy. The aged Admiral 'Jackie'
Fisher returned to the Admiralty as First Sea Lord at the invitation of
the responsible minister, Winston Churchill, who believed that Fisher
still had 'fire in his belly'. Fisher initially supported the
Dardanelles concept but soon became its fiercest critic at the very time
strong support was needed for it to have a real chance of success.
Warships were very
vulnerable to submarine attack in 1915, when depth-charges had not yet
been invented. The sinking of HMS Triumph and Majestic by the
German U21 under Lieut. Commander Hersing forced the withdrawal of the
largest British and French battleships from the Eastern Mediterranean,
with demoralising effect on some of the troops. On the other hand The
Australian AE2 torpedoed Turkish gunboats well inside the Narrows before
it was itself destroyed. British submarines under Lieutenant Commanders
Nasmith, Boyle and Stocks did substantial damage to Turkish ships in the
Straits, creating panic in Constantinople.
The Turkish Forces
Few of the Allied
troops had previous experience of modern warfare, but many of the Turks
were battle-hardened. They had not performed with much distinction in
the recent Balkan Wars, but then they had been fighting to retain
provinces with huge non-Turkish majorities. At Gallipoli the Turks felt
they were defending their homeland, especially when they learned that
Constantinople would come under Russian rule after a Turkish defeat.
Allied troops soon realised the stupidity of HQ propaganda about low
Turkish morale and lack of equipment.
Although medical organisation was
even worse on the Turkish than on the Allied side, most Turkish troops
fought with great courage, even when required to attack well-defended
positions without cover, as at the Nek in May and Helles in December,
just before the Allies withdrew from the peninsula. Their successful
defence of their lines at Krithia in May was significant in the final
outcome of the campaign.
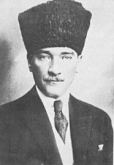 |
Mustapha Kemal ended
the Gallipoli Campaign as Turkey's greatest war hero, with little
tribute being paid to the able overall strategist, the German General
Liman von Sanders. Kemal was responsible for some of the bloodiest
Turkish losses and, had the Allies prevailed, might well have been
denounced for unnecessary deaths, since the Turks had only to hold on to
their hill positions to win the campaign, whereas the Allies had to
attack in order to justify the entire venture. On the other hand Kemal
rallied his troops successfully when the Anzacs nearly broke through
soon after their first landings and in later crises. |
 |
|
Kemel |
von Sanders |
Early in the campaign
many Anzacs believed the Turks practised vile atrocities on prisoners,
but later experience suggested that many disfigured corpses had suffered
from shrapnel rather than bayoneting after capture, although two British
officers were bayoneted in cold blood after surrender at Suvla in
August. After the truce at Lone Pine in May, during which the Turks were
able to pick up their over 10 000 casualties, Turks and Allied troops
regarded each other much more as decent human beings.
However, Turkish
treatment of prisoners of war was worse than treatment by Germans,
French, British or even Russian captors. The chilling account provided
by Greg Kerr in his Lost Anzacs is a salutary corrective to the
Turkish monument at ANZAC Cove, 'depicting a Turkish soldier fondly
cradling a wounded Australian', as Rhodes James put it in his Gallipoli.
Turkish troops were often threatened with immediate execution if
they withdrew and with officers such as Kemal that was no idle threat.
On the Allied side General Hunter-Weston recommended the MC to a young
subaltern who summarily executed three men for alleged cowardice.
Whilst the Gallipoli
campaign was being waged, the ' Young Turks ' government launched an
horrific attack on Armenian civilians, some of whom were suspected of
supporting the Allied cause. The Turkish massacre of the Armenians was
only exceeded during the century by the Nazi holocaust of Jews and the
mass killings ordered by Stalin. Of two million Armenians in Turkey in
1914, Alan Moorehead's estimate was that 'three quarters of a million
were dead or dying by the time the frantic rage of their tormentors had
exhausted itself' by 1916.
The early fighting
The British commanders
in Egypt as well as on the Western Front were reluctant to give the
swift backing to the Gallipoli enterprise essential for maximum chances
of success. There was abysmal lack of co-ordination between the French
and British forces, and between the British naval and military staffs,
although things were little better in this respect between German and
Turkish officers on the other side. One key difference, however, was
that General Sir Ian Hamilton was reluctant to interfere with the
immediate commanders in the field, who in their turn were often
uncertain about his overall strategic intent, whereas von Sanders forced
his decisions on subordinates. Several British officers were brought out
of retirement in 1914: the most able were usually used on the Western
Front and some appointments to commands at Gallipoli, such as Sir John
Stopford, proved disastrous.
 |
Some British
operations were carried out skilfully and successfully, such as the
organisation of supplies from Egypt, but there was considerable muddle
and confusion in the landings. Landing gear, medical supplies, water
carriers, and much besides, were all available in the vicinity but
rarely where and when most needed.
A popular joke among the troops
linked Imbros, Mudros and Chaos, the first two being the islands serving
as supply bases. Lines of Communication were weak and there was
resentment among the troops at reports of creature comforts for the HQ
staff at Mudros.
Hamilton was for some weeks mainly on HMS Queen
Elizabeth and in poor contact with shore operations. In the first wave of
landings in April, 1915, British troops under Hunter-Weston were
responsible for landings at Cape Helles, the southern tip of the
Peninsula.
The core was the regular 29th Division, supported by
battalions of recent volunteers. Some landings, such as that at W Beach,
met ferocious Turkish gunfire. |
|
Mule Gully Gallipoli |
As the Lancashire Fusiliers tried to
reach the beach they lost six officers (including the commanding officer
and his next-in-command soon afterwards) and 183 men killed, four
officers and 279 men wounded, and 61 men missing, out of 950 who started
out.
Six VCs, 2 DS0s, 2 MCs and one DCM were awarded at W beach on 25
April. The Dublin Fusiliers, Munster Fusiliers and Hampshire Regiment
suffered heavy losses, too, at V Beach under heavy Turkish fire, many
being killed as they tried to disembark from the River Clyde.
At X beach the Royal
Fusiliers met little Turkish resistance, nor did the South Wales
Borderers at S beach, or the King's Own Scottish Borderers, South Wales
Borderers and Plymouth Battalion of Marines at Y beach. Unfortunately,
Hunter-Weston thought his task was to land the troops successfully and
failed to order immediate progress inland. Thus the Turks had ample
opportunity to reinforce their positions, and the belated Allied
penetration inland was bitterly contested. At 'Y Beach' there was
uncertainly whether Lt-Col Koe of the Scottish Borderers or Lt-Col
Matthews of the Marines was in command, with the result that no one was
effectively in charge. After Koe and many other officers had been
killed, some troops panicked and sought evacuation on the boats, even as
new troops were being landed and the Turks were retreating because of
losses under naval gunfire.
 |
The Allied dilemma was
that energetic attack was the only way of securing victory, and assaults
on defended heights immensely bloody, but early aggression might have
ensured that the Turks did not occupy positions from which they later
dealt out severe punishment.
Morale varied greatly from unit to unit.
The Border Regiment broke and ran when charged by the Turks on 28 April,
whereas the Royal Fusiliers and Royal Scots successfully repelled a
similar attack on 1 May.
In June the Manchesters, Lancashire
Territorials and Worcesters broke through nearly to Krithia, which would
have forced a massive Turkish retreat, but Hunter-Weston reinforced the
stationary Royal Naval Division, not the advancing units.
Hunter-Weston.
a martinet who was strangely enough very popular with his men, collapsed
in July, leaving behind an army utterly exhausted and incapable of
further offensive action.
Indian and British losses at Gully Spur on 28
June were even higher than anything at Anzac, but Turkish losses were
higher still and the Turks on Helles were close to breaking point. |
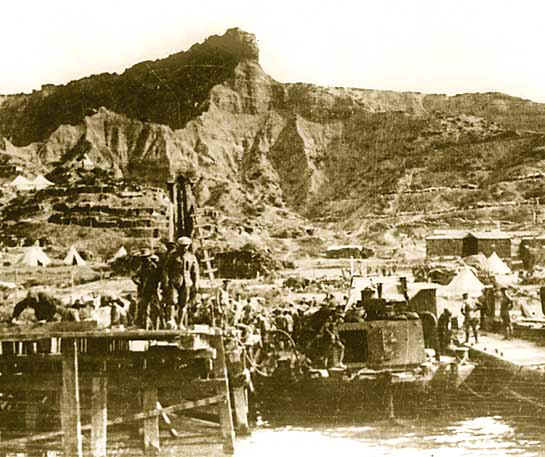
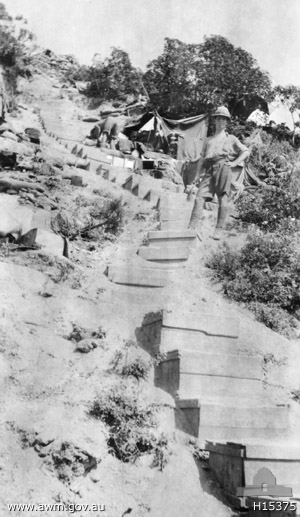
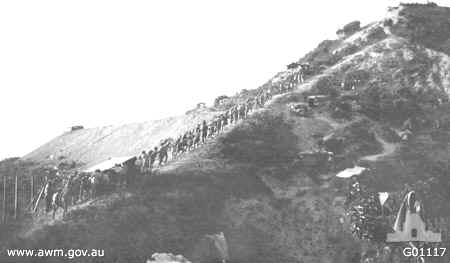
| Gallipoli, Turkey. 1915. Steps cut in the
hillside and strengthened with packing cases behind Pope's Post. (Donor
Captain R.J. Webster) |
The landings at Anzac
Cove in April were a mile north of those intended. Whether strong
currents were to blame, errors by Lieut. Commander Waterlow, the British
naval officer directing the landings, or even a late change of plan by
Generals Birdwood and Throsby, remains uncertain to this date. Yet the
initial landings were successful, since the Turks did not expect them,
and two parties of Australian troops under Captains Lalor and Tullock
fought their way inland. Lalor was a scion of an old English military
family, who had deserted from the Royal Navy, fought in revolutionary
wars in South America and then sailed to Australia to enlist in its
army.
Lalor ordered his men
to dig in on hill Baby 700 but they were reported by a scout sent to
check on their progress to be 'smoking and eating as if on a picnic',
one soon interrupted by a murderous Turkish counter-assault. The
Australians then counter-attacked up the hill against massive odds and
Lalor, wielding an old family sword, was killed with many of his men. An
hour's picnicking exacted a heavy price. Nearly all the Anzac units were
handicapped by razor-sharp cliffs and deep ravines, unsuspected since
they landed at the wrong beaches and had the wrong maps. They also faced
the most able and determined Turkish commander in Kemal.
| The main effort of the
French troops was on the Asian shore of the Dardanelles, where they
captured the fort at Kum Kale previously badly hit by British warships.
Turkish troops who went through the motions of surrendering killed the
French officer accepting the surrender, following which French troops
executed eight Turkish prisoners.
The French commanders had problems
with their Senegalese regiments, which sometimes fought hard and
sometimes surrendered under little pressure. |
 |
| Sedd-el-Bahr, Turkey. 1915-05-06. Scene
from the beached ship SS River Clyde showing British Army troops landing
at V Beach across a path of barges and pontoons from the ship. This
landing led to an Allied drive up the end of the Gallipoli Peninsula. |
Hamilton had great
difficulty in preventing the French commander, General D'Amade, from
ordering total evacuation. Some of the French generals, such as General
Bailoud, proved very inadequate, but great courage was shown by most of
the French forces. At Helles their attack on Kereves Spur, heroic but
unavailing, greatly impressed allies and enemies.
The heavy Anzac losses
led the Divisional Commanders, Major-General Godley of the New
Zealanders and Scottish emigrant Major General Bridges of the
Australians, to recommend that Anzac Beach be evacuated. Hamilton
instead urged them to dig in, which they did and so ensured that the
campaign became immortalised in Australian and New Zealand history. The
Australian approach was embodied in Colonel Braund, whose defence of
Russell's Top, overlooking the main landings, probably saved the
situation. Braund was accused by New Zealand Colonel Malone of having
'no defensive position, no plan, nothing but a murderous notion that the
only thing to do was to plunge troops out of the neck of the ridge into
the jungle beyond'.
Braund was soon
afterwards shot by an Anzac sentry whose challenge he did not hear.
Malone nearly shared the same fate and several Allied troops died in
that way. Within a week of the landings the Anzacs suffered 6,554
casualties, including 1,252 dead. The opposing Turks, so their own
officers estimated, suffered 14,000 casualties, the majority killed.
British Marine reinforcements sent to support the Anzacs were described
by General Birdwood on their arrival as 'nearly useless ... special
children of Winston Churchill, immature boys with no proper training',
but they proved him wrong and won Anzac respect by scaling and
re-capturing Dead Man's Ridge on the night of 2-3 May after the
Australians had been forced to retreat.
Within a few days of
the Anzac Cove landings, the situation there was relatively quiet, so
that Hamilton moved some ANZAC troops south to join in what he hoped
would be a critical attack, The Australians lost over a thousand men
during an advance of under 600 yards up the steep Krithia Spur on 8 May
when their courage made them deeply admired among the Allied troops who
had not been at their side at Anzac Cove.
Quite apart from
bullets and shells, lice and flies, together with poor food and water
shortages, contributed to acute dysentery - the Gallipoli Trots, which
affected three out of four Allied troops. Dental disease also became
acute. Australians suffered severely from these scourges, partly because
they were generally less rigorous in hygiene routine than the British or
New Zealanders and partly because they bathed frequently in the
contaminated sea. The British, held by the Australians to keep their
towels dry, may have benefited for once from aversion to water. On the
positive side, British aircraft under Commander Samson, whilst not
inflicting a great deal of actual damage, were feared by the Turks and
greatly encouraged the Allied troops.
 |
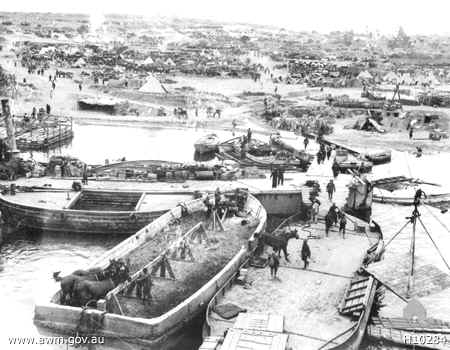
Gallipoli Peninsula, Turkey. c. 25 July
1915.
This photograph depicts one of the many difficulties
with which our troops were confronted on Gallipoli. Before bringing in
troops for the big battle of August, it was necessary to provide stores
of water. |
| The great platform leveled
for water tanks above Anzac Cove are seen here, and troops are dragging
the water tanks
up the hill to get them into position. |
The later fighting
The best Allied
military plan at Gallipoli was devised by Lt-Col Skeen, a scholarly
Scottish migrant who lectured at Quetta Staff College before the war. It
revolved on the capture of Sari Bair Ridge and Chanuk Bair, the heart of
the Turkish position. The plan was partially adopted by Hamilton in
August: Australians under Walker were to attack the Turkish lines at
Lone Pine, whilst the New Zealanders tried to outflank the Turks to the
north. At the same time, British and French troops further south at
Helles were to attack once more the strong Turkish positions at Krithia
and Achi Baba, and other British troops were to land at Suvla Bay north
of Anzac Cove.
Execution of the plan
was delayed, partly because of the worst accident in the history of
railways in Britain, when at Gretna Green on their way south 210
officers and men of the Royal Scots were killed and 224 injured. The
attempted break-out from Anzac Cove was planned well, but aerial
photographs proved very misleading, since they failed to show a timber
cover protecting the Turkish trenches or a steep gully interrupting any
advance. In bloody and confused fighting Turks sometimes killed Turks
and Australians killed Australians.
The Australians came
close to a complete breakthrough but were finally overwhelmed with the
loss of over 2000 men, the Turks suffering 7000 casualties, in the
bloodiest single encounter during the whole campaign. The New
Zealanders, Wellington Mounted Rifles and the Auckland Regiment,
supported by Gurkhas, Wiltshires and South Wales Borderers, made rapid
early progress towards the key point of Sari Bair. Much of their good
work was undone by the New Zealand commander, Brig-General Johnson, who
ordered a halt until the Canterbury Battalion, which had lost its way,
arrived. The New Zealanders' best scout, Major Overton, was killed
during the advance.
The Gurkhas broke
through their opposing positions and the Turks were nearly encircled,
but Johnson's lack of determination gave the Turks time to reinforce
their positions. Johnson's failure was costly for the Australian 3rd
Light Horse, who had to charge the Turkish trenches at The Nek.
Furthermore, the Welch Fusiliers, protecting the Light Horse flank, were
forced by Turkish bombs back down the hill they were trying to climb.
The Light Horse lost 372 out of 600 officers and men from Turkish fire
within minutes.
The New Zealanders,
Welsh Fusiliers and Gloucesters fared no better: only 70 out of 760 New
Zealanders survived unwounded, the 8th Welsh Fusiliers lost 17 officers
and 400 men, and the 7th Gloucesters lost every officer and sergeant and
over 350 other men. The Turks, too, suffered heavily in these battles,
but Kemal threw all his reserves into the biggest assault of the
campaign on 10 August at Chanuk Bair and The Pinnacle against the Allied
front trenches in the Anzac section. None of the British troops, mainly
Wiltshires, survived the assault.
The British, French
and Indian troops at Helles did their part in the August plan, but lost
heavily in assaults on strong Turkish positions. The key weakness was
the Suvla Bay landings. Blame lies mainly on Hamilton, who surrounded
his plans in an air of secrecy: Turkish spies knew more of his plans
than did his own commanders in the field, let alone his junior
officers.
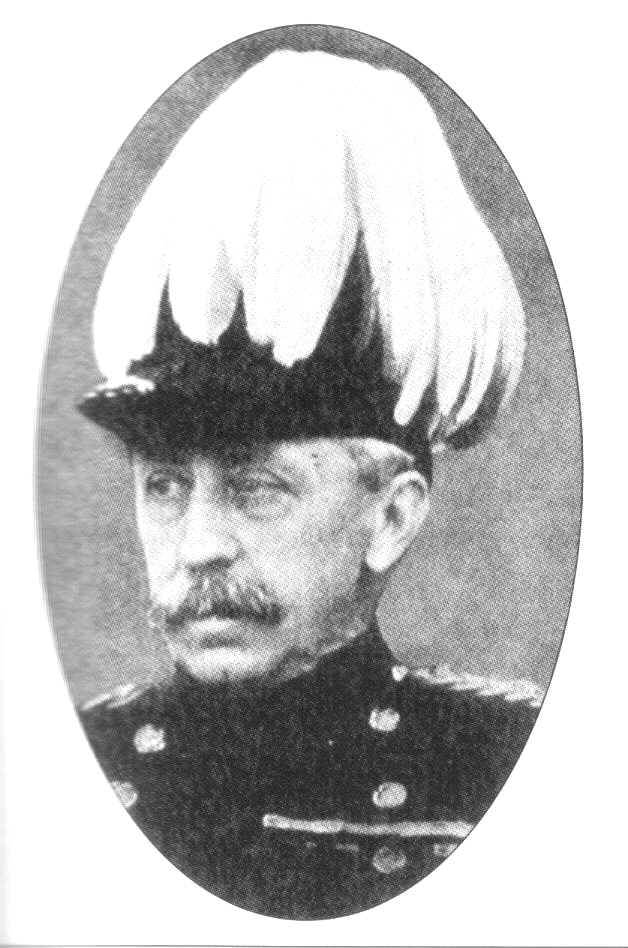 |
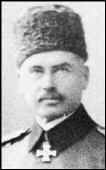
Lieutenant-General Sir Frederick Stopford: his generalship at Suvla was disastrous and he became the scapegoat for the failure of the August offensive.
He was elderly beyond his years and had never commanded men in battle before.
His specialty was ceremonial duties. His Who's Who entry for 1920 did not mention his time as a corps commander at Gallipoli. In his mind it never happened. |
Hamilton fatally
changed the initial instructions to Stopford to read: 'your primary
objective will be to secure Suvla Bay as a base for all the forces
operating in the northern zone .... If it is possible, without prejudice
to the attainment of your primary objective, to gain possession of these
hills at an early period of your attack, it will greatly facilitate the
capture and retention of Hill 305'. The original plan was justified if
surprise was achieved and rapid advance took place to occupy the ridges
overlooking the bay, but Stopford felt he had done great deeds if his
forces simply managed a successful landing.
Many of the British
troops landed on August 6 at Suvla Bay were inexperienced and had never
undertaken a night landing before. Many suffered severe reactions after
cholera inoculations. Some landings took place significant distances
from the intended points, so that the troops were faced with landmarks
they did not recognise.
One battalion of the
Lancashire Fusiliers lost 60 per cent of its officers and 20 per cent of
its rank and file between the night landing and the following noon.
However, at other landing points there was little resistance and 20 000
men were put safely ashore. Had they advanced resolutely inland, they
might have captured with relatively few casualties the positions at.
Kiretch Tepe and Tekke Tepe. Instead for a day and a half several units
loafed around the beach waiting for instructions and unaware that the
heavy fighting a few miles to the south could only succeed if they
attacked the Turkish positions quickly and vigorously. An East Yorkshire
officer and signaller climbed to the top of Tekke Topi and reported it
unoccupied, but the message never reached Hamilton or any senior
commanders.
The troops at Suvla
Bay were short of water and were soon blisteringly hot, but staying on
the beaches did not help them or the other Allied forces. The positions
they should have attacked were soon occupied by Turkish gunners who
rained down fire on the Suvla beaches. The East Yorkshires were shot to
pieces from heights they themselves could well have occupied. A few days
later, Hamilton and General de Lisle, who replaced the demoralised
Stopford, decided on a further major attack at Suvla across the Salt
Lake which forced the Turks to bring in their last reserves, but British
losses were over 5000 and no significant advance was made. The last
realistic chance to occupy the Gallipoli Peninsula was gone.
The Withdrawal
Hamilton's
replacement, Sir Charles Monro, did not take long to decide that the
Gallipoli positions could not be held, let alone extended to threaten
the Straits and Constantinople, without massive injections of men,
artillery and ships which were not going to be made available. Unfairly
blamed by Churchill for limp capitulation, Monro took the decision which
enabled the remaining Allied troops to fight another day, which many did
on the Western Front and Middle East.
As winter set in,
instead of flies and sunstroke, the troops suffered from frostbite and
extreme cold. At Suvla there were over 12 000 cases of frostbite and
exposure, nearly 3000 at Anzac Cove and 1000 at Helles. One junior
officer found 30 Worcesters frozen to death in a single trench. Heavy
seas made supplies harder to land and any withdrawal more difficult week
by week. Those for staying on argued that bad conditions at sea meant
that losses in trying to withdraw might well be as high as a third of
the troops. In the event, the withdrawal from Gallipoli was perhaps the
most successful part of the expedition.
Monro ordered
withdrawal first from the Suvla and Anzac positions, both of which were
under heavy Turkish counter-attack. Between 14 and 18 December 80 000
men, together with most of their guns and stores, were shipped out
without the Turks being aware that a withdrawal was taking place. The
Helles withdrawal took place only after one of the most ferocious
Turkish assaults of the campaign. Von Sanders did not want the Allied
troops to escape without loss as at Anzac and Suvla, but his assault
against the British 13th Division holding Gully Spur was met with
tremendous resistance: the Turkish losses were never revealed. 164
British casualties were the price of ensuring the complete withdrawal of
over 35 000 men from Helles. Nearly 4 000 horses and mules were shipped
out as well. The French battleship Suffren managed to sink a large
Allied transport ship, but fortunately before it had been filled with
departing soldiers.
Can Gallipoli be
Justified?
The Turkish command
was lax in record keeping and the official Turkish figures of 86 692
killed and 164 617 wounded or missing are likely to be a significant
under-estimate. Rhodes James suggested that Turkish total losses were
about 300 000. Estimates of the British and Dominion losses lie between
198 000 and 215 000, with something like 46 000 dead. Hell's
Foundation by Geoffrey Moorhouse, describes most movingly the
effects of the campaign on Bury, the depot town of the Lancashire
Fusiliers.
Losses in Kitchener's
'New Army' affected particular towns very badly, since many workmates
and school friends enlisted together in 'pals' or 'chums' units and
often died together as well. The Australian dead were about 7,600 and
the wounded and missing about 18,500, the New Zealanders about 2,450
dead and 5,150 dead and missing. French casualties were probably about
50,000. These were dreadful losses compared with British campaigns
during the previous century, although relatively light compared with the
slaughter on the western and eastern fronts in Europe.
The British Royal
Commissions which reported in 1917 and 1918 described the operations as
ill-conceived and ineptly executed, with thousands of lives needlessly
squandered. This view was held, too, by A. P. Herbert, General Sir
William Robertson and, in Australia, Charles Bean. Churchill led
opposition to this view, especially in The World Crisis, and
other efforts to rehabilitate Gallipoli were made by Hamilton, Admiral
Roger Keyes, John Masefield and Ernest Raymond. Their view gained some
backing when it became known that at two or three times in the early
exchanges, the Turkish forces were close to retreat and defeat.
'Optimists' still hold that with more energy in mine-sweeping the Allied
fleet could have passed into the Sea of Marmara before the landings took
place. 'History' seldom makes a final decision on such matters.
Alan Moorehead,
referring to the 'constantly repeated belief that posterity would never
forget' exploits such as those at Gallipoli, asked in 1956, 'who in this
generation has ever heard of Lancashire Landing or the third battle of
Krithia? He answered, 'Even as names they have almost vanished out of
memory'. Now the 'almost' can be omitted so far as the Tommies and
French and Indian troops are concerned. Perhaps because Australia and
New Zealand have less of a burden of history to carry, Gallipoli is
still remembered in the Antipodes.
Propaganda
Distorted propaganda
is usually at its height during wars but corrected in later years. In
the case of Gallipoli the opposite occurred. The official Australian war
historian, Charles Bean, was reluctant to hint that Australians were
ever less than heroic, and in the interests of maintaining good
relationships with Australia, Cecil Aspinall-Oglander, the official
British war historian, toned down even implied criticisms of any
Australian action. As Rhodes James observed, the result of massaging the
truth was an 'Australian mythology that Gallipoli was an Australian
triumph thrown away by incompetent British commanders'.
-
Far worse distortions
disfigure the Peter Weir film Gallipoli, which seeks to contrast
cowardly and idle British troops with ANZAC heroes. Some British troops
did bathe and drink tea at Suvla Bay whilst horrific fighting was taking
place a few miles to the south, but others were as fully engaged in that
conflict as New Zealanders and Australians.
-
Rhodes James noted that the
'suicidal assault' of the Australian Light Horse at The Nek on 7 August
1915 'had nothing to do with the British landing at Suvla, but was
intended to help the New Zealanders, as the film's military advisers
knew'.
-
However, 'the principal Australian sponsor of the film
(Rupert Murdoch) wanted an
anti-British ending, and got it', with 'the deliberately inaccurate
final scenes' of the film, a potent source of Australian republican
sentiments.
-
Few Australians realise that 'the British, French and Indian
causalities were far greater than those of the Anzacs, and that the
British bore the brunt of the fighting - and the losses.'
Far from covering up
British errors, British historians exposed them at every level, from
Kitchener, Churchill, Fisher and Hamilton down. The indecisiveness of
the naval commanders , the muddle at Imbros, the incapacity of Sir
Frederick Stopford, and every other British failing, were laid bare to
the world. This is as it should be, if anyone is to benefit from past
errors, but in 2001 British people, no more or less than Australians and
New Zealanders, can take pride in heroic deeds at Gallipoli, as indeed
can French, Indian, Pakistani and Bangladeshi people. We should not
allow latter-day propagandists to sow seeds of unwarranted resentment
between peoples whose ancestors fought with great courage in a common
cause. |